![CoudDepot_LOGO_RGB.png]](https://kb.clouddepot.com/hs-fs/hubfs/CoudDepot_LOGO_RGB.png?height=40&name=CoudDepot_LOGO_RGB.png)
Background
When you merge contacts in Xero, all transactions from the duplicate contact are reassigned to the main contact and the duplicate contact is then archived.
Unfortunately this process isn't automatically replicated in Cloud Depot so a few steps need to actioned by you to complete the merger.
Before you begin
Make sure you have copied over the payment method on file
This guide shows you how to move invoices from your old archived company to your new company.
We will walk you through this process by using an example that we have setup in Xero.
In our example we have two companies:
Company A
Company B
We will merge Company A into Company B in Xero. This means all invoices from Company A will be moved to Company B, and Company A will be archived in Xero.

Step 1. If you haven’t already done so, merge the two customers in Xero. In this example, sign in to Xero and locate the company you want to archive and merge, which is Company A.

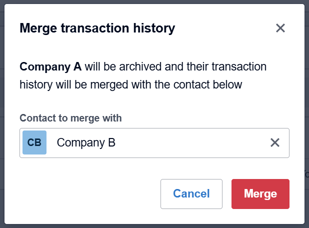
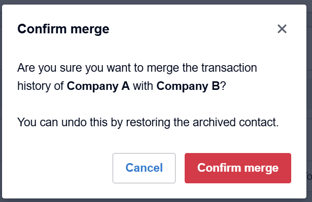
Now the merge is complete we will still have two companies in RPS with invoices still attached to company A. Before we can delete company A in RPS we must first move the invoices over to Company B.
Step 2. Navigate to the old company’s Invoices tab.
In this example, that company is Company A.
Then find the button at the bottom of the page called Manually Refresh Invoices with Xero. Click that button to be navigated to a refresh page.
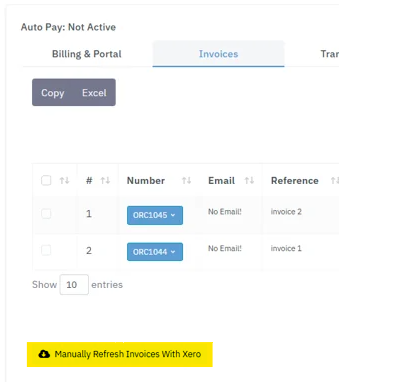
Step 3. You will see a list of invoices.
Select all of them, then click Refresh Invoices With Xero.
This process may take several minutes, depending on how many invoices you have.
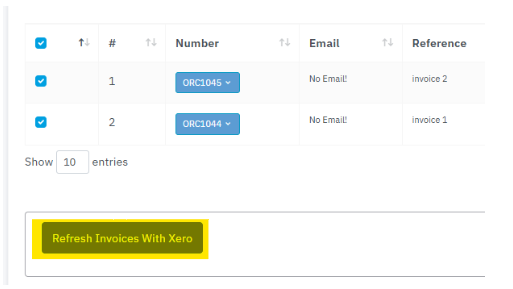
Step 4. Once the process is complete, all invoices should disappear.
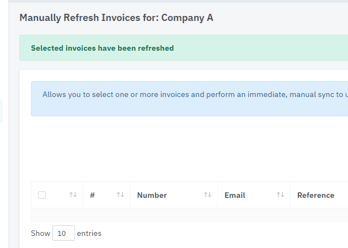
Step 5. Log in to the new company and confirm that the invoices appear. In this example, the new company is Company B.
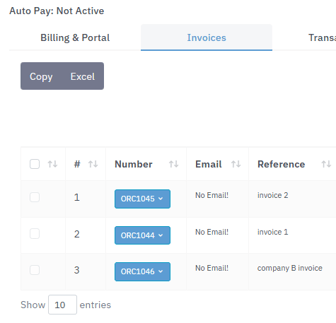
Step 6. Once you have confirmed the invoices have been moved, navigate back to the old company.
In this example, that company is Company A. Then scroll to the bottom of the page and delete the company.
