Prerequisites
Before you begin, ensure that:
- Cloud Depot RPS (Recurring Payment Service) is fully configured.
- You have administrative access to your HaloPSA instance.
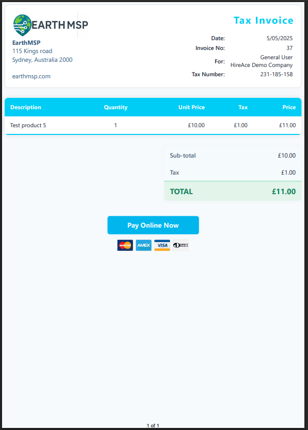
(Example of a HaloPSA PDF invoice with Pay Online Button)
Step 1: Copy Your HaloPSA Code Snippet
Cloud Depot generates different code variations depending on whether you want a styled button or a text hyperlink.
- Log into Cloud Depot and navigate to Recurring Payments > Configuration > Customer Portal.
- Click on the HaloPSA Payment Details tab.
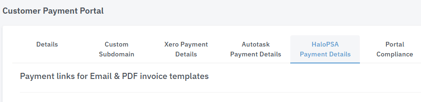
- Choose either the Hyperlink HTML or the Button HTML option.
- Copy the entire raw code block and save it to a notepad for later use.

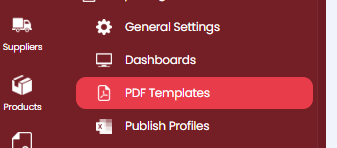
Step 2: Access the PDF Templates in HaloPSA
- Log into HaloPSA with administrator privileges.
- Go to Configuration > Reporting> PDF Templates.
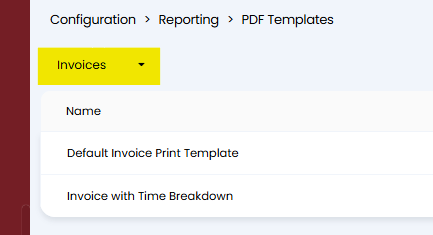
- Locate the template you use for customer billing and click Edit (or click New to create a dedicated layout for online payments).
Step 3: Insert the Payment Link Code
HaloPSA allows you to inject raw HTML directly into specific structural containers on the PDF layout.
Option 1 - Use HTML Footer
This option will add your payment button to each invoice template page and is the simplest setup method.
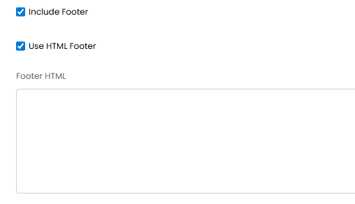
- Click Edit button then click the Appearance Tab
- Click Include Footer and Use HTML Footer
- Paste in the code from step 1 item 4 above.
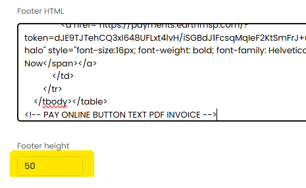
- Set the Footer height to be 50 (this can be adjusted if its too much)
- Save changes and preview your PDF to see the outcome
Option 2 - Amend the HTML code to place the button in the body
This option places the payment button in the body of the invoice (as shown in the example above). Unlike the footer option, the button will not repeat on every page. This method is more technically advanced, but if you are comfortable working with HTML, it provides a more flexible and precise placement.- Click Edit button then click the Pages Tab
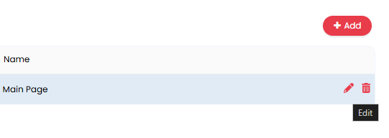
- Select the page you would like to place the button on, in our example the page is called 'Main Page' then click the pencil icon to edit
- Important: Before making any changes, copy all of the HTML and save it to a text file as a backup. If you make a mistake, you can easily roll back to the original version.
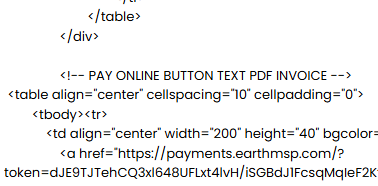
- Scroll through the HTML until you locate the
$INVOICETOTALtag. This is where the customer sees the total amount due and is the most logical position to insert the Pay Online button.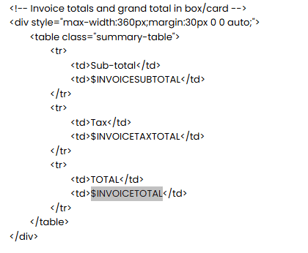
- Under the last </div> tag under <table>. Paste in the code from step 1 item 4 above.
- Scroll to the bottom and save changes.
- Preview your PDF template and make any necessary changes.