Please note that each account requires a new subscription with Cloud Depot on our instant Sync Plan.
Before you start, make sure there are no pending invoices in Autotask that need to be synchronized. It is recommended to reach out to our support team before beginning the setup process so that we can provide assistance throughout.
How it works
Cloud Depot utilizes a Parent and Child setup to control the synchronization of invoices.
The main Cloud Depot account (parent) takes charge of collecting new invoices and distributing them to the child accounts. To specify the child accounts where the invoices should be sent, you can make use of User-defined fields in Autotask (UDF).
In this example, the organization has three Xero companies, all of which are supported by a single Autotask Account named ABC Company Support. These Xero organizations are located in the UK, Australia, and the USA.
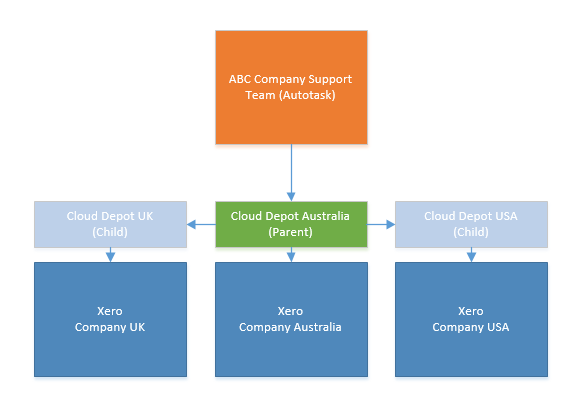
During the initial setup, we created three new Cloud Depot Accounts using our user-friendly signup wizard. As part of this process, we connected to the single Autotask account and linked each Cloud Depot account to its respective Xero account. Once the setup was complete, we temporarily paused the synchronization process.

The Parent Account for Cloud Depot Australia (highlighted in green) is responsible for managing the flow of invoices and ensuring that they are sent to the appropriate child accounts based on the User-Defined Fields (UDFs). This account serves as the central control point for invoice distribution and data synchronization within the system.
Setup Your User-Defined Fields
To set up User Defined Fields in Autotask, follow these steps:
1. Navigate to Admin -> Features & Settings -> User-Defined Fields.
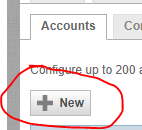
2. Under the Accounts tab (which may be called Companies, depending on your version of Autotask), click on New.
3. Provide a name and description for your User-defined field.
4. Choose the field type as "List (Single Select)".
5. Optional: Select the "Required" option if necessary.
When naming your User-defined field, be sure to provide a description. If you choose to make it a required field, we suggest using the default option on the list. This default option should be applied to the account that has the highest number of Autotask accounts.
|
Name: Name of your UDF Description: Describe your UDF Field Type: Required: (Optional) |
 |
Note: An alternative option is to set up the list without including your Parent company and without a default option. With this configuration, all invoices will automatically be sent to the parent account, unless a child account is specifically selected in Autotask. This setup is especially useful for customers who only have one child account and expect the majority of invoices to be directed to the parent account. If you require assistance with configuring this option, please feel free to reach out to our support team for guidance.
Advise Cloud Depot Support of the Accounts
Please inform Cloud Depot of the values you have set for your User-Defined Fields (UDF). Provide us with the names of each Cloud Depot Account, along with their corresponding UDF Value. Also, let us know which account you have selected as your Primary Account. Our support team will then link your organizations together and provide guidance on when you can start testing the setup. (Feel free to send us a screenshot as well)
Apply the correct Account to each customer in Autotask
After setting up your User-Defined Fields (UDF), you can now apply them to your customers in Autotask. To do this, go to the User Defined tab in the Customer account and locate the UDF you set up. In our example, it is called "Xero Account." We recommend setting up a few customers and doing a test run to ensure that the UDF is functioning correctly.

Note your UDF might not show up by default.
UDF not showing in your Autotask Company (Account)?
1. Login into Autotask
2. Navigate to Admin -> Features & Settings
3. Open the Accounts & Contacts panel then select Account Categories
4. Select you account category then on the context menu select edit
5. Select the Details tab
6. Find your UDF from the list and make sure its visible to all.
![]()
