Please note: This feature needs to be activated on your account please contact Cloud Depot Support first.
Looking for tracking category mapping from account codes? See our article here on how to set that up
Introduction
Xero allows for up to two tracking categories. With Cloud Depot, you can map the territory field in Autotask to the first tracking category in Xero.
How to setup
If you haven't already done so, log into Xero and setup your tracking category
https://central.xero.com/s/article/Set-up-tracking-categories
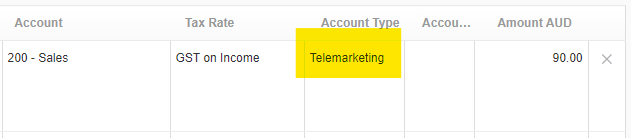
Xero example
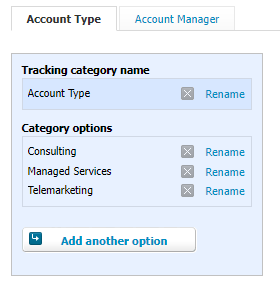
In this example, we have set up two tracking categories: Account Type and Account Manager.
You have the flexibility to choose any name for your tracking category. Our tool simply requires that the names of your options match in order to accurately map them.
Autotask
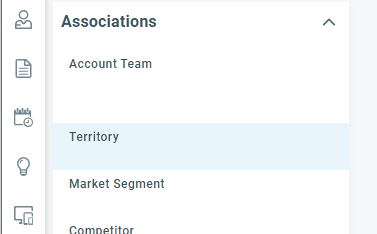
If you haven't done it yet, go ahead and set up your territories in Autotask. It's important to make sure that the names of your territories match the options names you created in Xero's Category. This will ensure accurate mapping between the two platforms.
https://ww1.autotask.net/help/Content/4_Admin/2FeaturesSettings/CompaniesContacts/Territories.htm
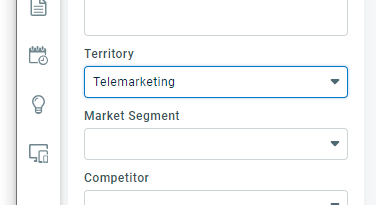
Autotask Example
In Autotask under the Account (Customer) we select edit to update the tracking
 |
 |
Make sure you contact our support team and we will turn on territory tracking categories for you in Cloud Depot
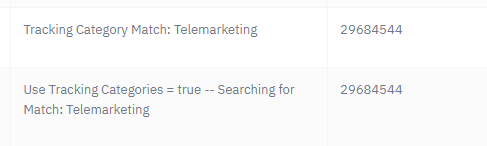
Once the setup is completed successfully, you will be able to see entries in our sync logs during the synchronization process that resemble the example provided below.